To view your accounts, click on Accounts in the top navigation menu and select Accounts from the list. This section gives you a clear, organized view of all your Mascoma Bank accounts, along with detailed transaction activity to help you stay on top of your finances.
If you need tax related information, the Tax Information tab provides easy access to your available tax documents and data.
Analytics
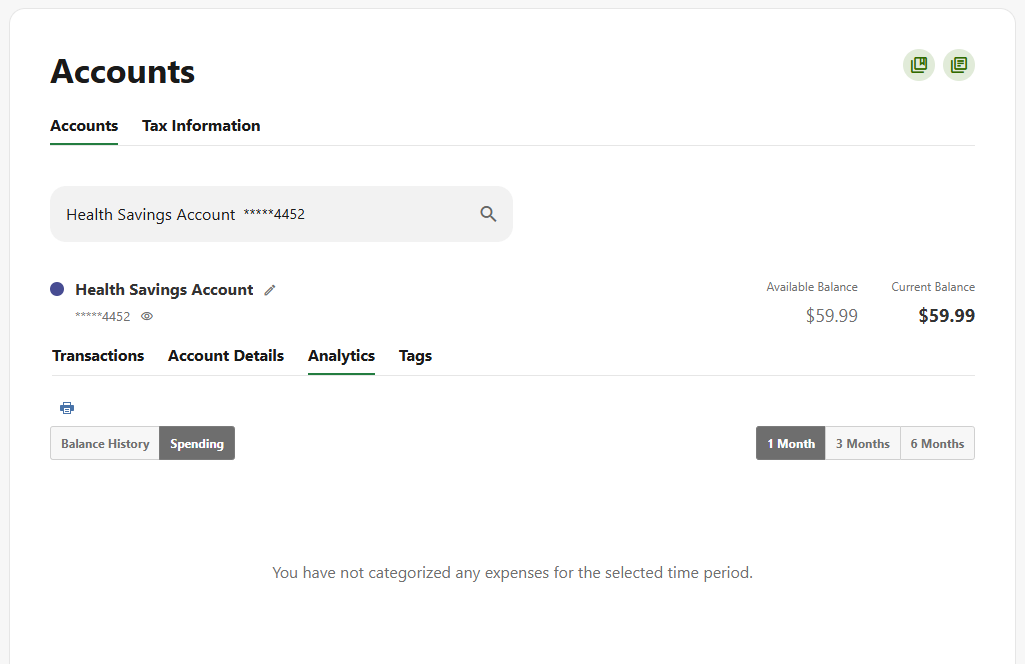
The Analytics section provides insights into your account activity and transaction history, helping you better understand your finances over time.
Within Analytics, you can choose from two views:
- Balance History – View how your account balance has changed over time.
- Spending – Review your spending activity and identify trends across your transactions.
You can also customize the time period displayed by selecting one of the following ranges:
- 1 Month
- 3 Months
- 6 Months
Use these options to analyze your financial activity, track balance changes, and gain a clearer picture of your spending habits
Update a Transaction’s Simple Description
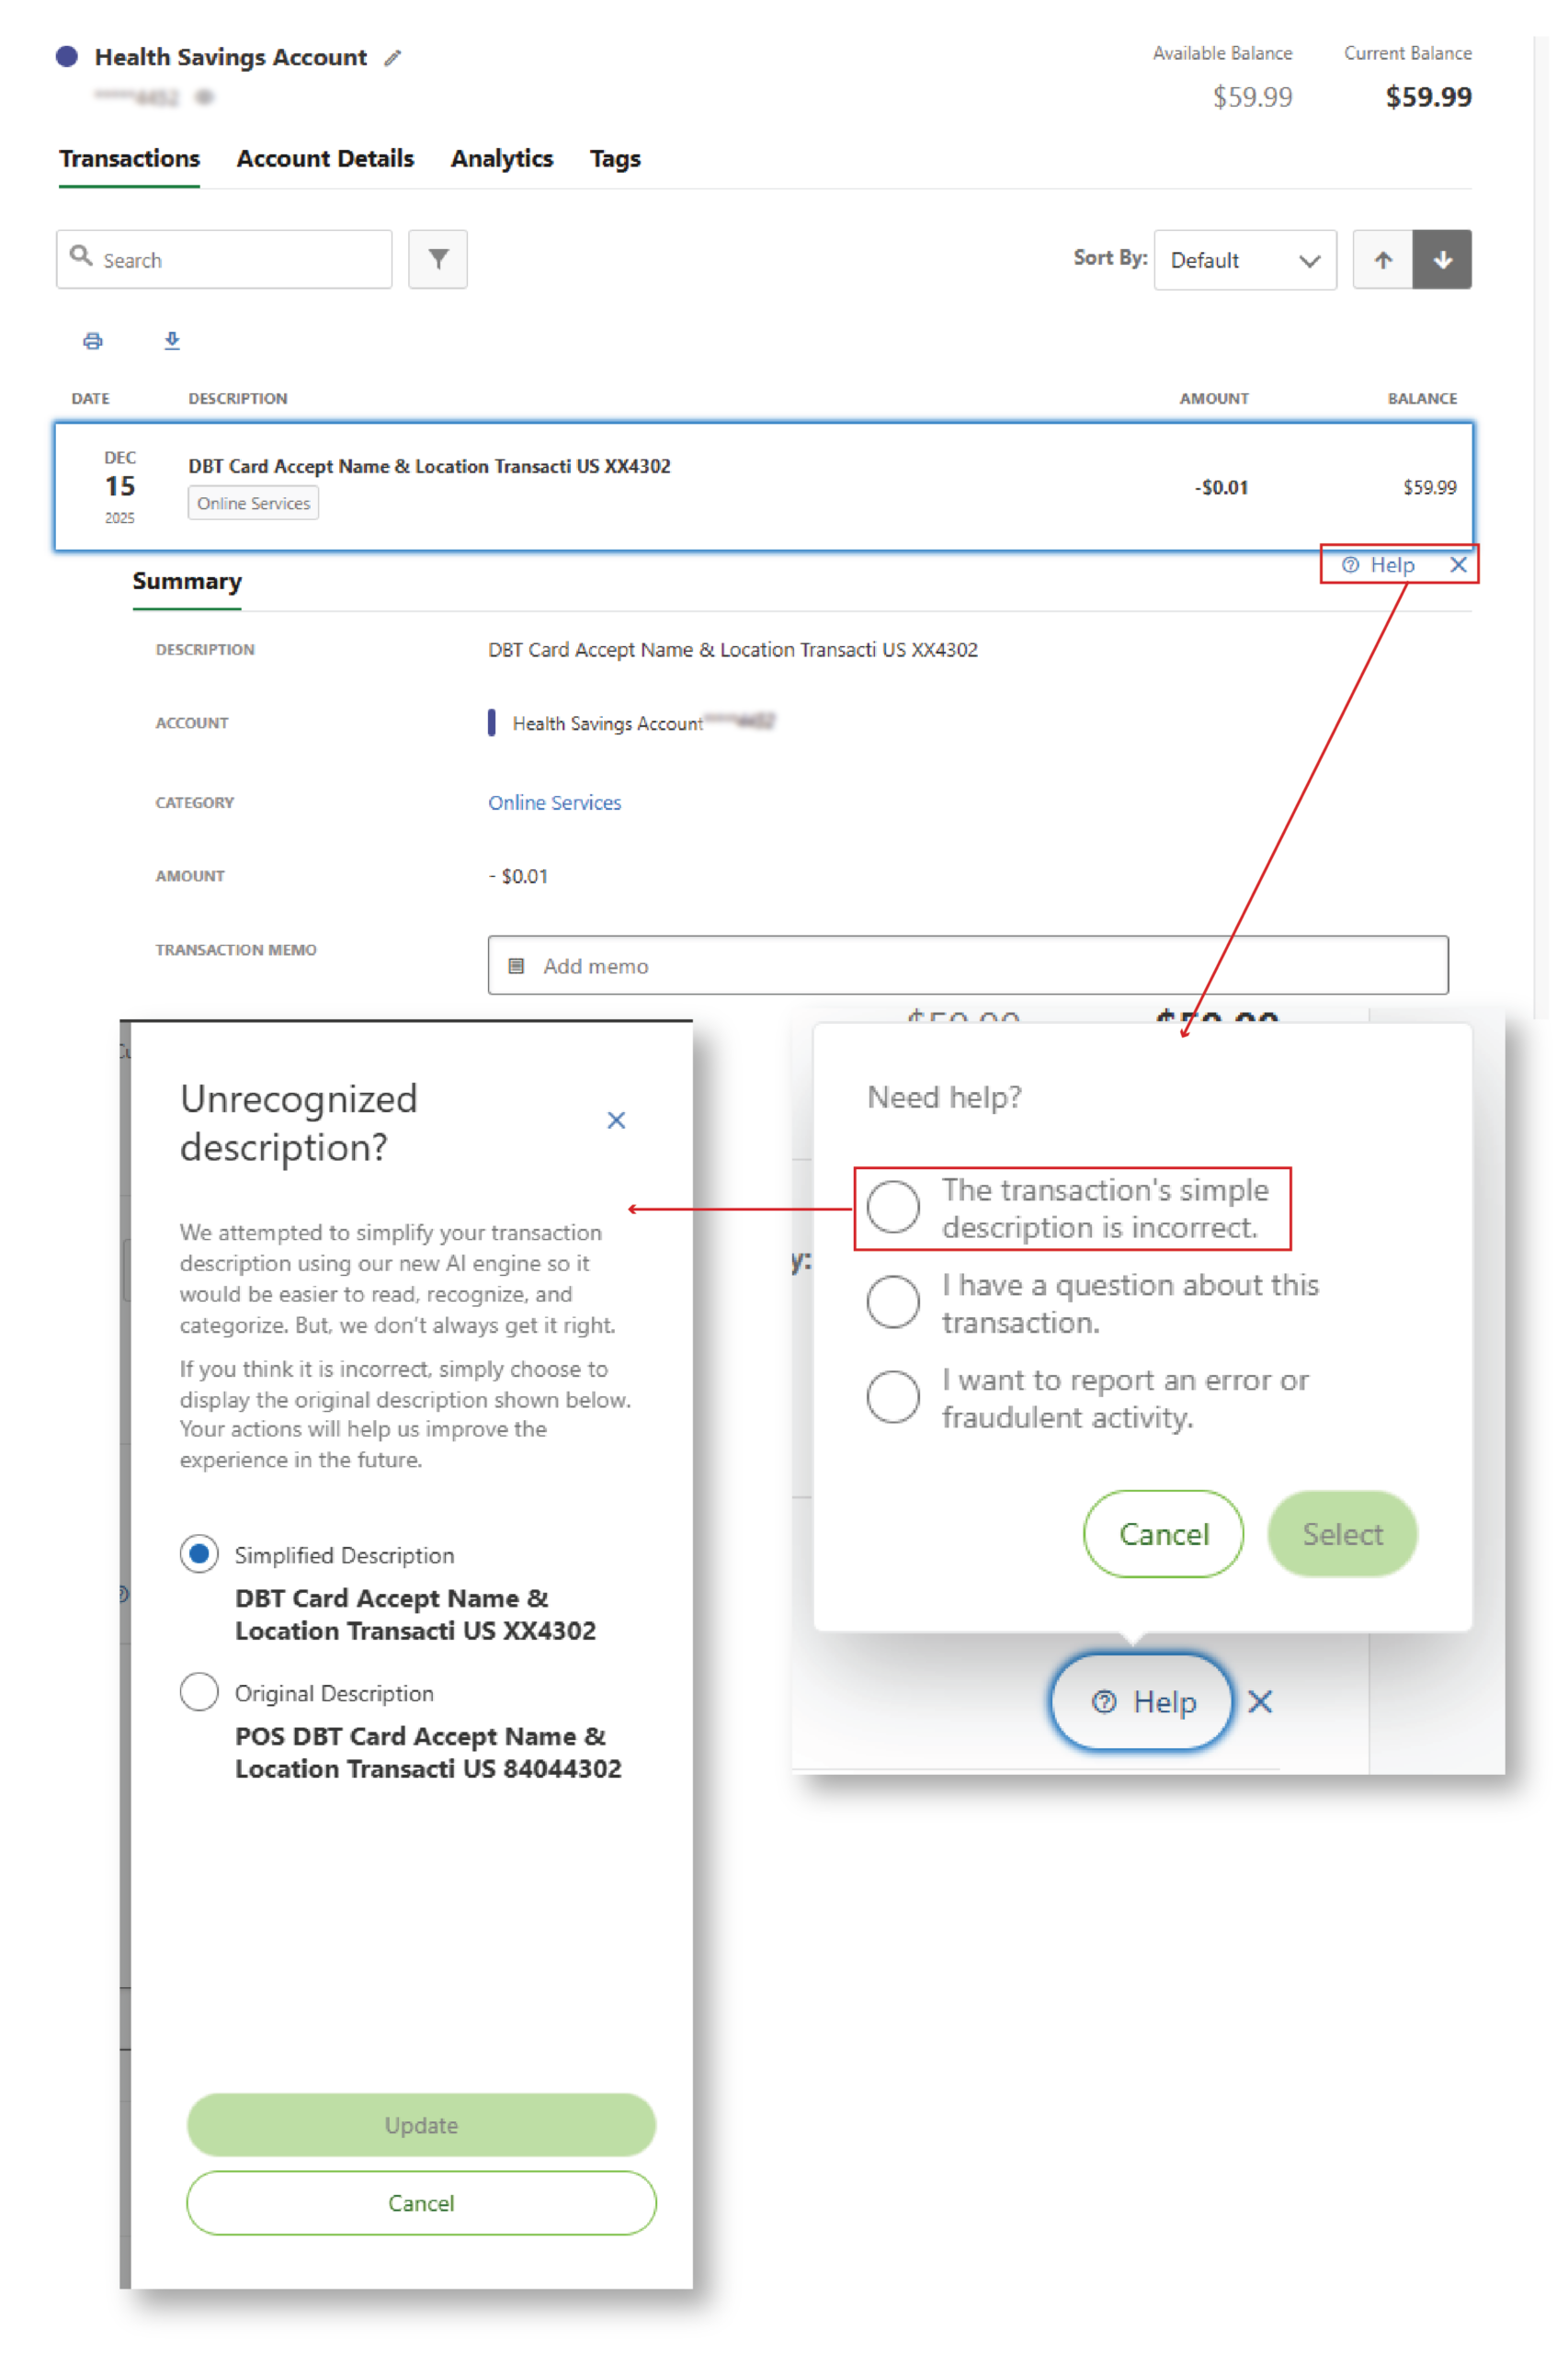
If a transaction’s simple description appears incorrect, you can suggest a more accurate description directly from the transaction details.
To update a transaction’s simple description:
- Select the transaction you want to review.
- Click the Help link within the transaction details.
- In the pop-up window, select The transaction’s simple description is incorrect.
- The digital banking app will suggest a simplified transaction description to make transactions easier to read, identify, and categorize. While these descriptions are designed to be more user-friendly, they may not always accurately reflect the actual transaction. If the suggested description appears incorrect, you can choose to select the original description.
- Select the description that best matches the transaction.
Updating the simple description can make your transaction history easier to understand and help you quickly identify transactions when reviewing account activity.
Statements
To view your eStatements, click on Accounts in the top navigation menu and select Statements. This is where you can access all your available electronic statements in a convenient place.
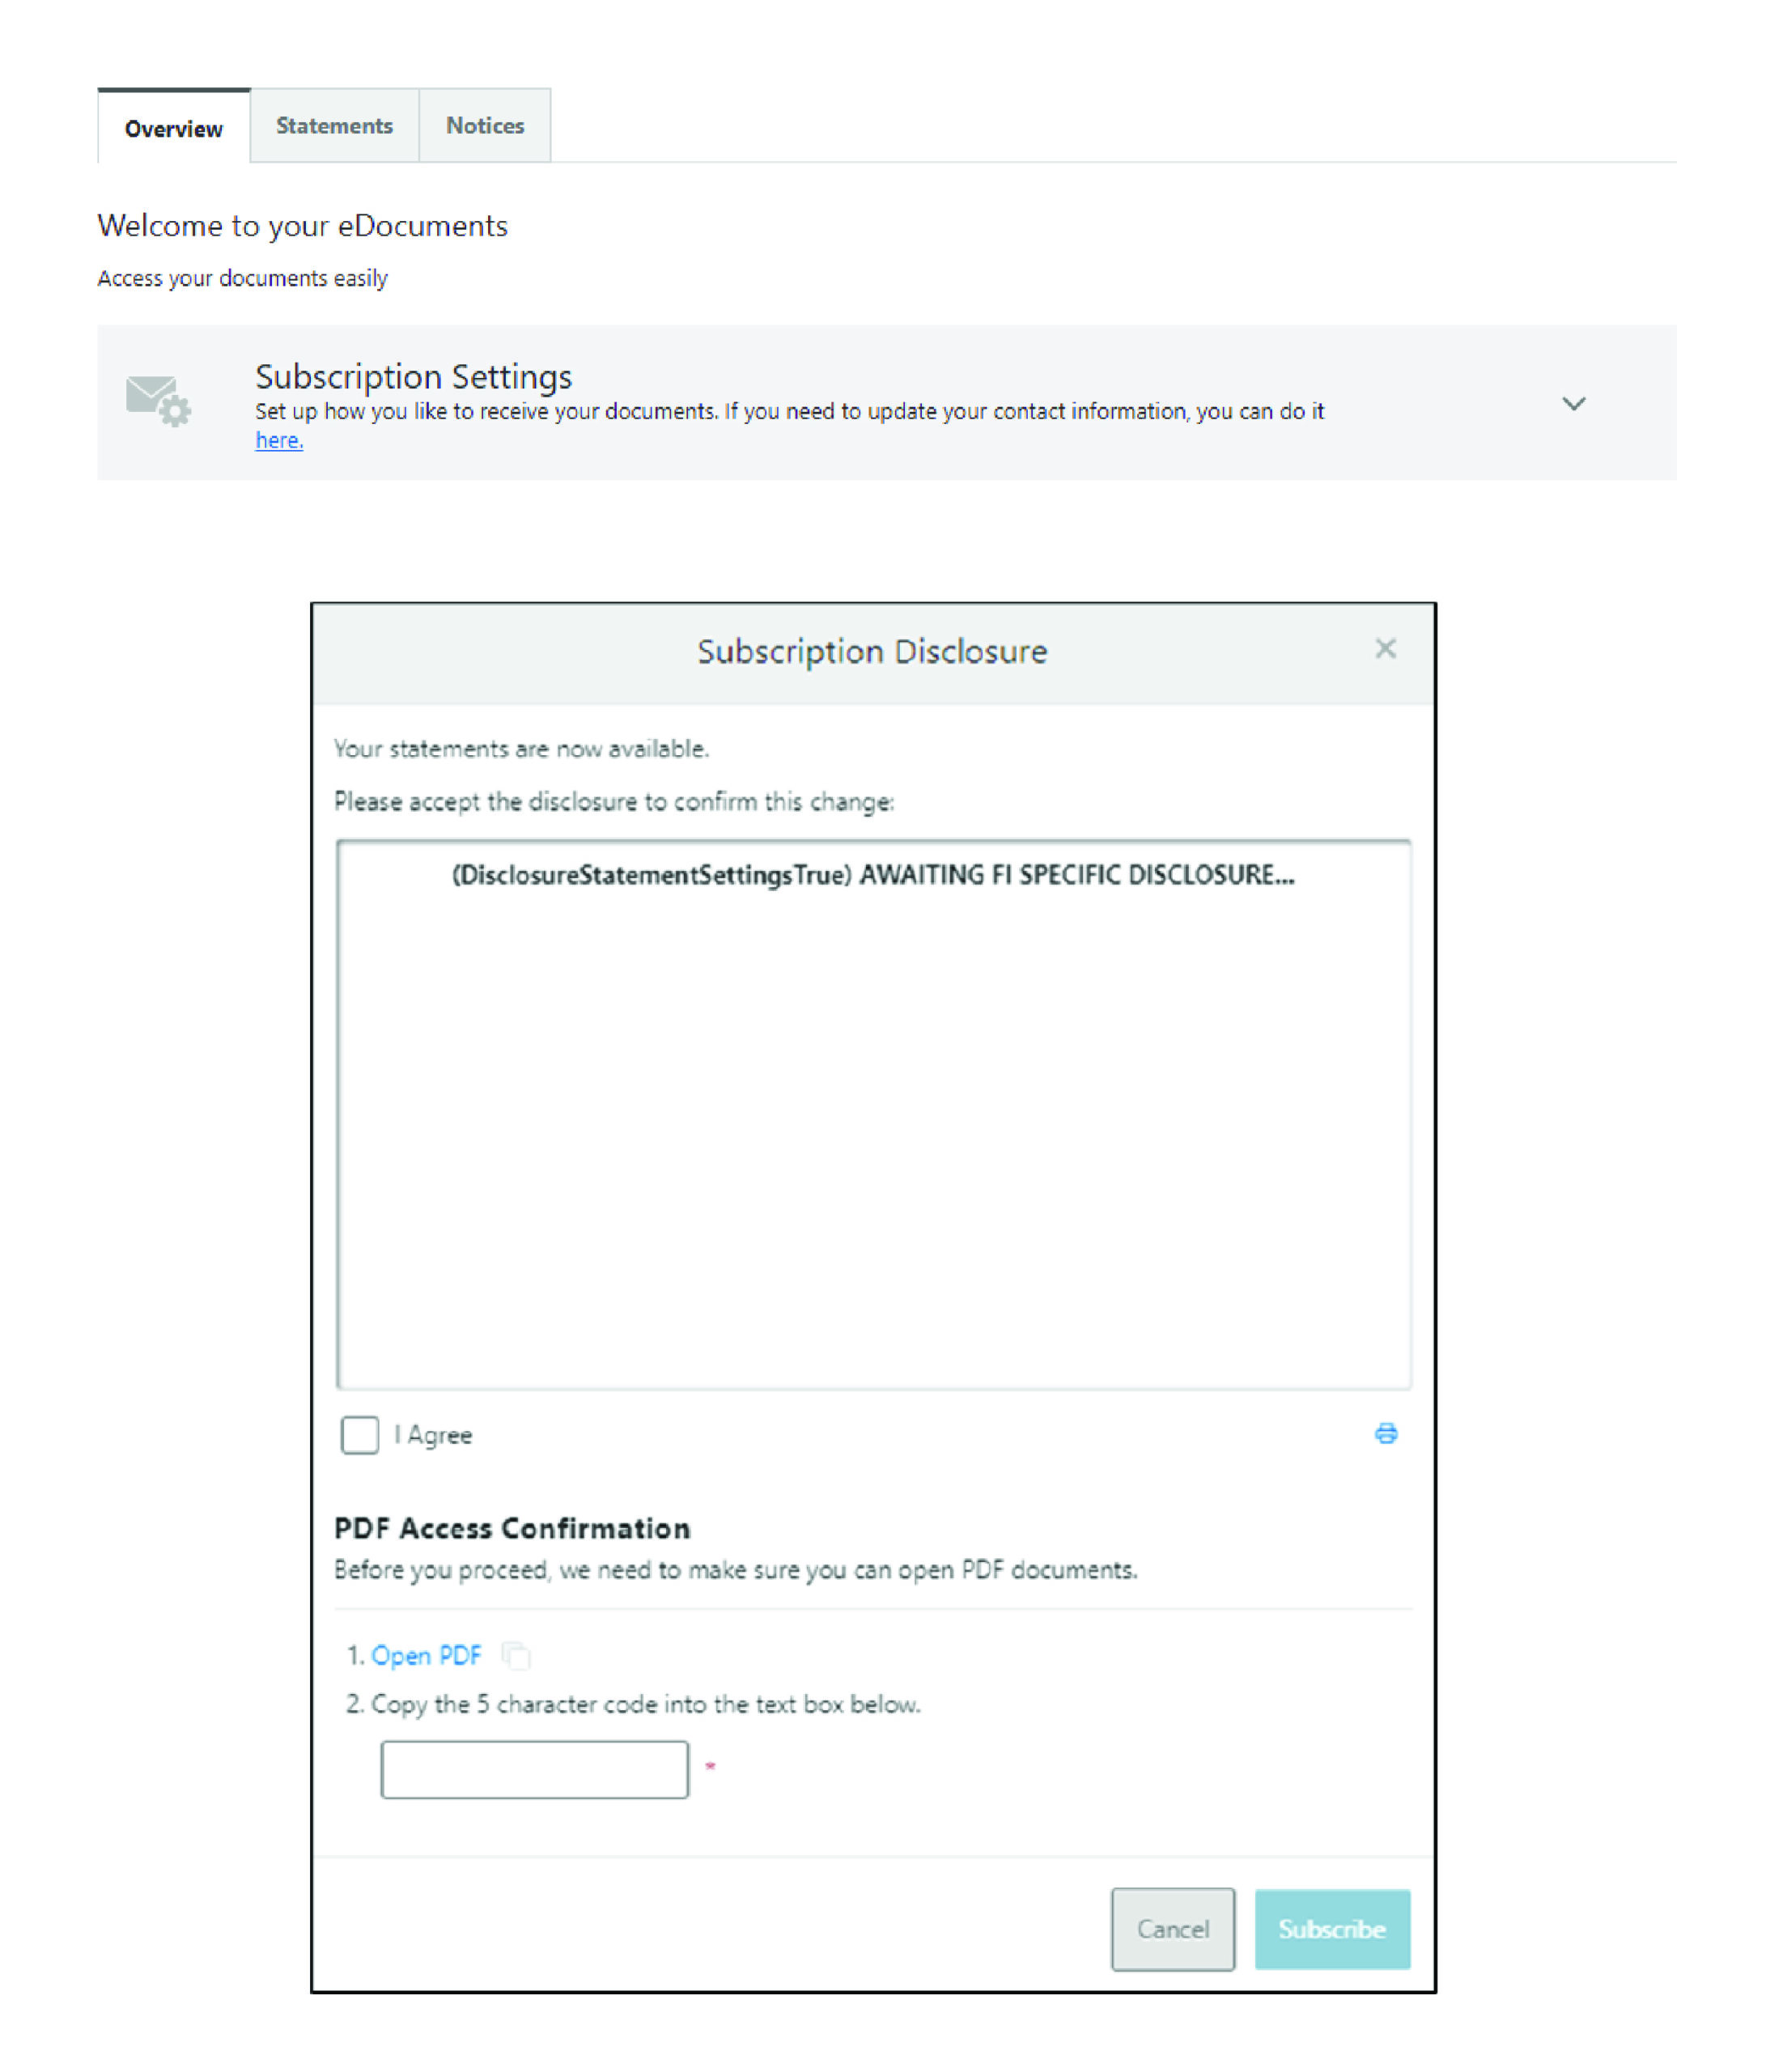
If you haven’t enrolled in eStatements yet, the Overview tab will guide you through a quick setup. Simply click Subscribe, review the disclosure, confirm that you can open PDF documents, and check I Agree to complete enrollment.
Once subscribed, the Statements tab will display all your eStatements, making it easy to review or download your documents whenever you need them.
ClickSwitch
To switch your direct deposits or recurring payments, click on Accounts in the top navigation menu and select ClickSwitch.
Mascoma Bank partners with ClickSwitch to make moving your direct deposits from another financial institution to your new Mascoma account quick and simple. Just click Open to get started.
A new webpage will launch, where you can choose whether you want to switch your direct deposits or transfer your recurring payments. From there, ClickSwitch will guide you through the steps to complete the process.
Switching Your Direct Deposit
You have the option of switching by manually entering details or by using Switch Assist.
Manual Option – Direct Deposit
- Enter who pays you and click the “Continue” button
- Select which account you’d like the deposit to go to and click the “Continue” button.
- Please note, required information may vary depending on the type of direct deposit you are adding.
- Next, enter further details regarding this direct deposit. Click the “Continue” button
- Confirm the details and click the “Submit” button
Your direct deposit is on its way! It may take a few cycles to reflect on your account.
Switch Assist/Plaid Option – Direct Deposit
- Mascoma Bank uses Plaid to connect to your other financial accounts. Click the “Continue” button
- Select your institution
- Enter your credentials and click the “Submit” button
- Follow the prompts to complete the process
Manual – Recurring Payments
- Click the “Enter recurring payment details” button
- Enter who you’d like to pay and click the “Continue” button
- Select the account you’d like to take these payments from and click the “Continue” button
The following screens may differ depending on who you are paying. Some companies may require you to log into your online account.
- Click the hyperlink to log into your account, if needed
- Click the “Ok” button. This will bring you to the company’s website where you can log into your account
Others may ask you to manually enter details regarding the account.
- Confirm and click the “Continue” button
- Confirm the details. Click the “Submit” button.
The switch has been made. You can expect to see the changes within 1 to 2 billing cycles.
Please reach out if you have questions or need additional assistance.