You can create custom groups to organize your accounts in a way that makes sense to you—like “Bills,” “Savings,” or “Travel.”
Use the following steps to set up custom groups within your accounts in digital banking.
Step 1: Log in to Digital Banking
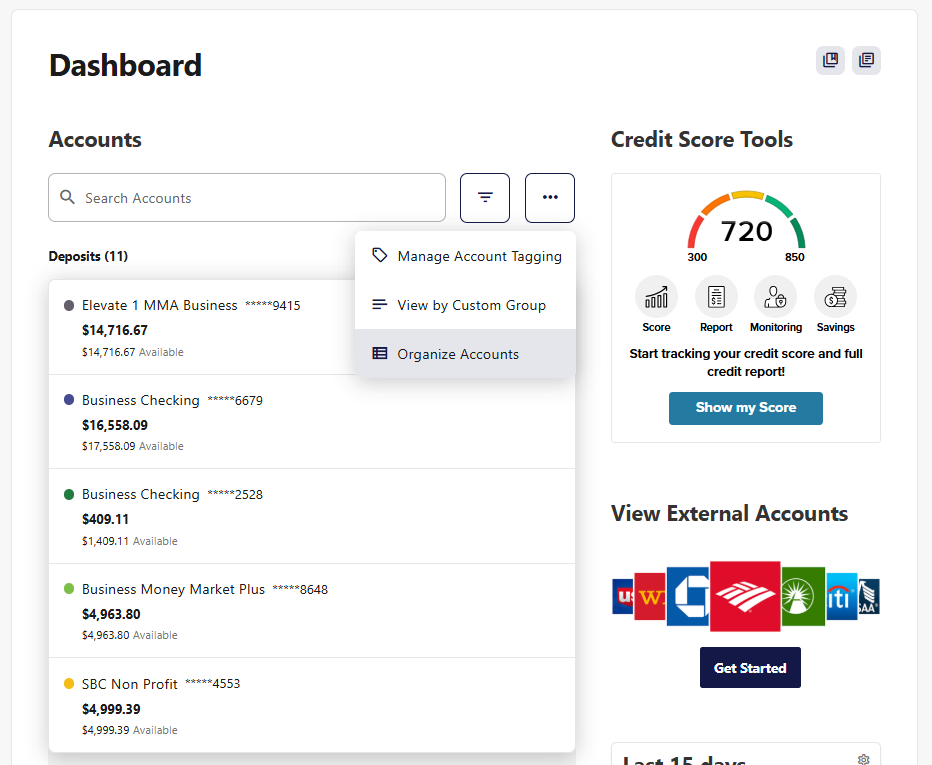
Once you’re signed in and viewing your main dashboard:
- Click the ellipsis icon (⋯) located above your list of Accounts.
- Choose Organize Accounts from the menu.
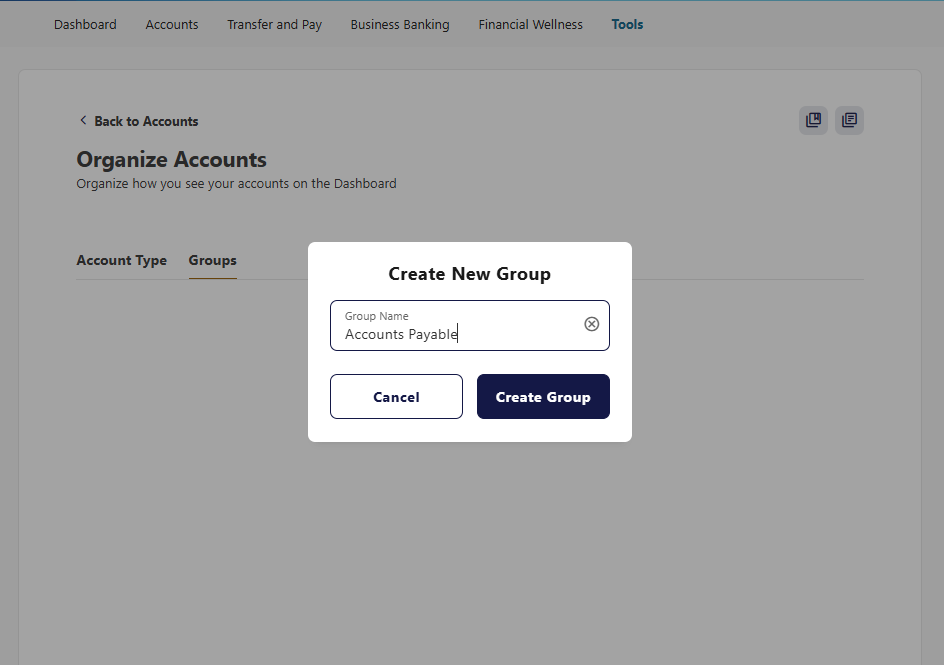
Step 2: Go to the Groups tab
- Within Organize Accounts, look for the Groups tab.
- Click Groups to view and manage your account groups.

Step 3: Create Your First Group
- Click Add a New Group.
- Type a Group Name (for example: “Bills,” “Everyday Spending,” or “Savings”).
- Click Create Group.
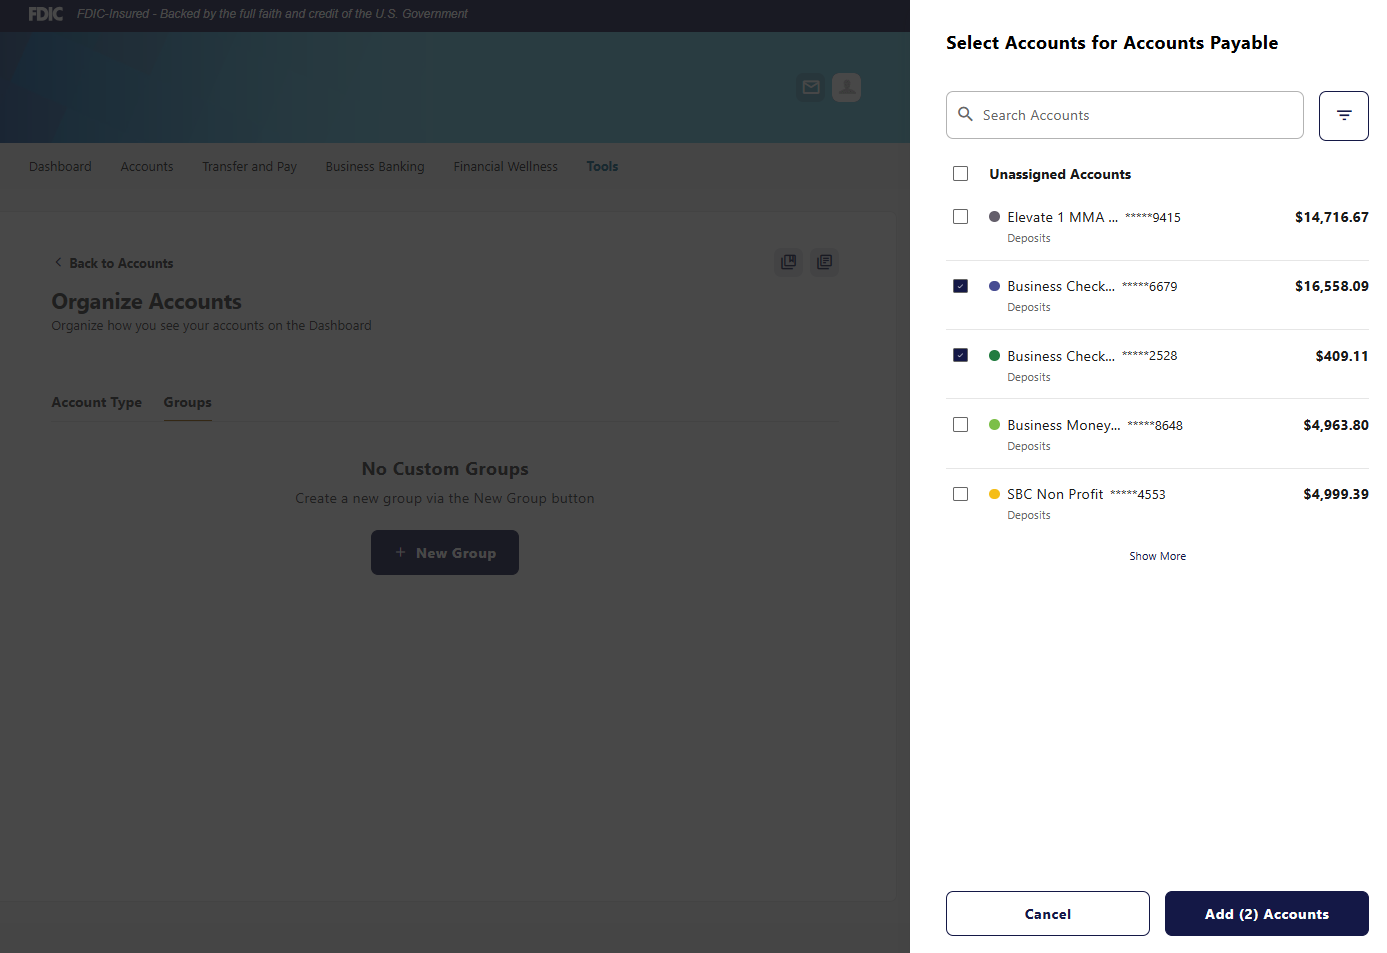
Step 4: Choose Which Accounts to Add to Your New Group
Once your group is created:
- A list of your available accounts will appear.
- Select the checkboxes next to the accounts you want to include in this group.
- Click Add (#) Accounts to confirm your selections.
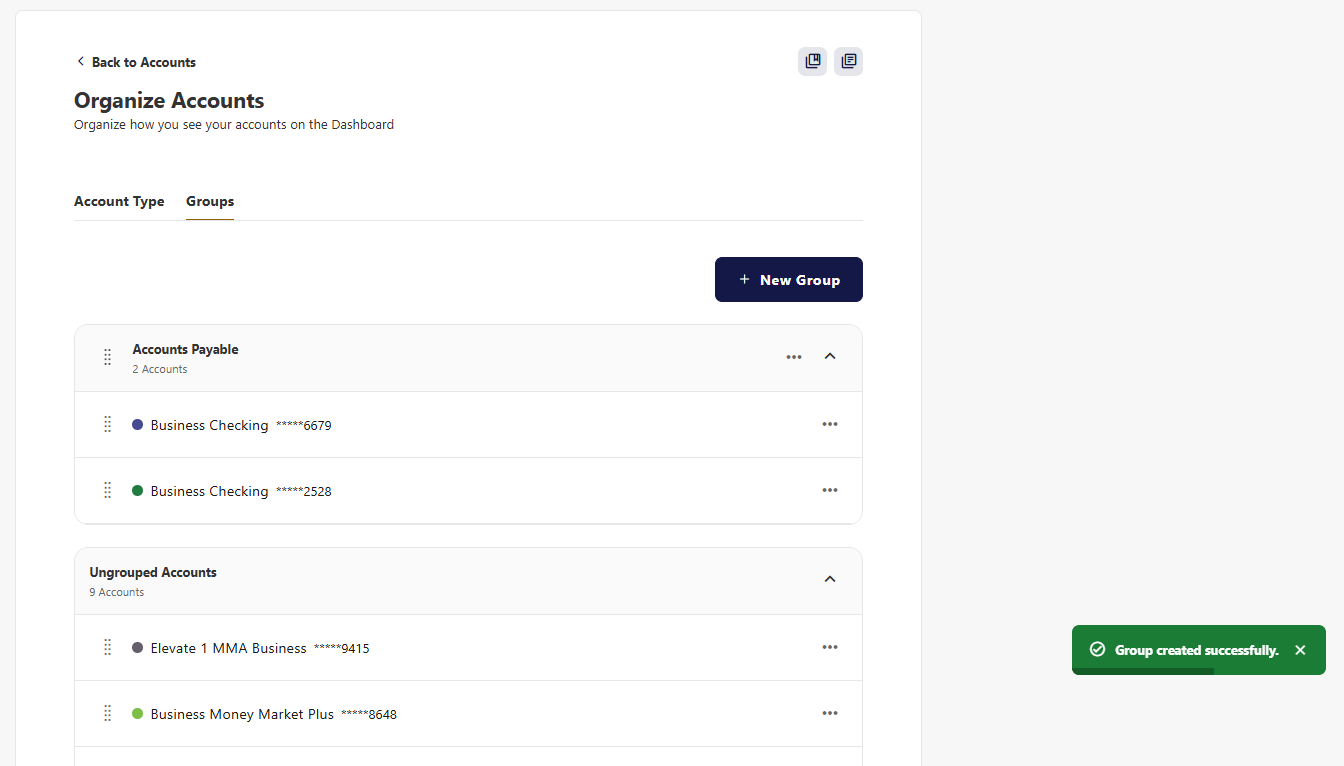
Step 5: See Your Accounts in Their New Group
Your selected accounts will now appear inside the group you created.
You’ll see them organized together on your main dashboard the next time you log into digital banking.
Step 6: View Your Groups on Your Dashboard
On your main dashboard, you can view your grouped accounts:
- Click the ellipsis icon (⋯) above the list of your Accounts.
- Select View by Custom Group.
- Your accounts will now display in the groups you created.

Please reach out if you have questions or need additional assistance.